
I recently submitted my entry to Summer’s Woodworking‘s 2014 2×4 competition, and I have been asked to put together plans for the toolchest. At first I thought that it would be tough since I improvised my way through this project, but as I thought about how I could do it anyway I realized that I could at least share with you how I went about buiding the chest.
The original chest
The idea for the chest, for the actual design of the chest, stems from a real-life tool chest I have in my shop. It is made of metal and has seen better days, but it still works fine and I use it frequently for (repair) work around the house.
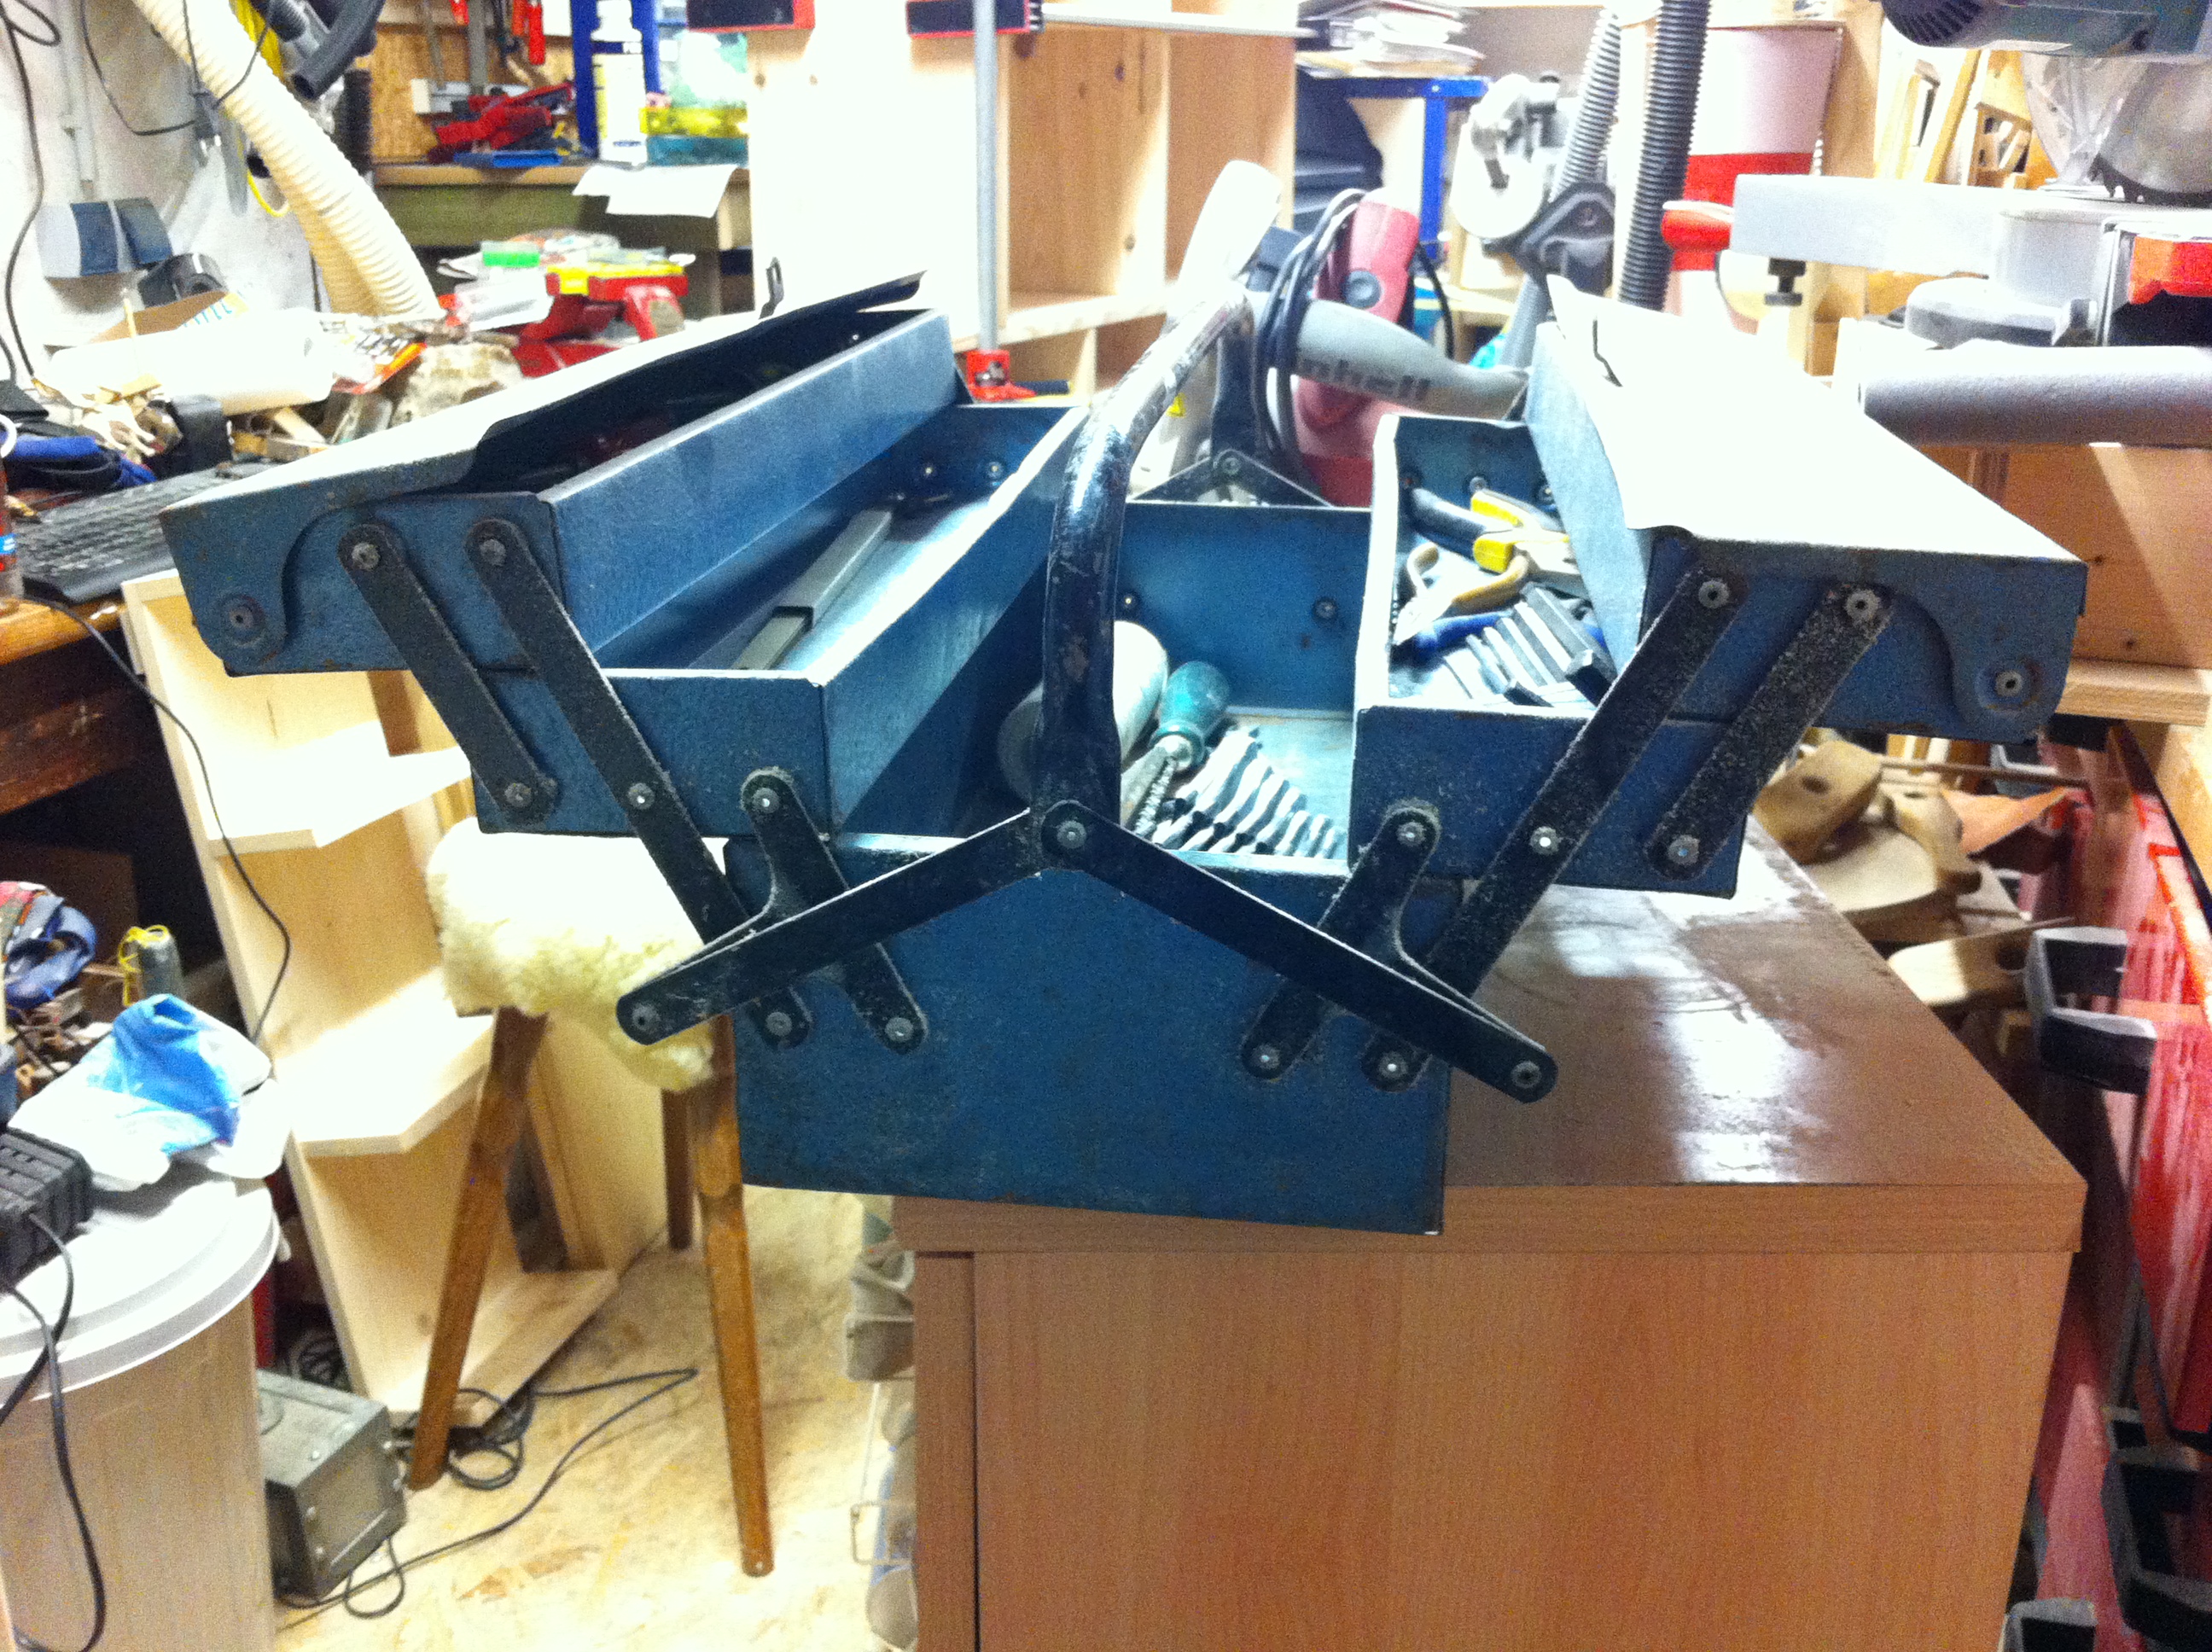
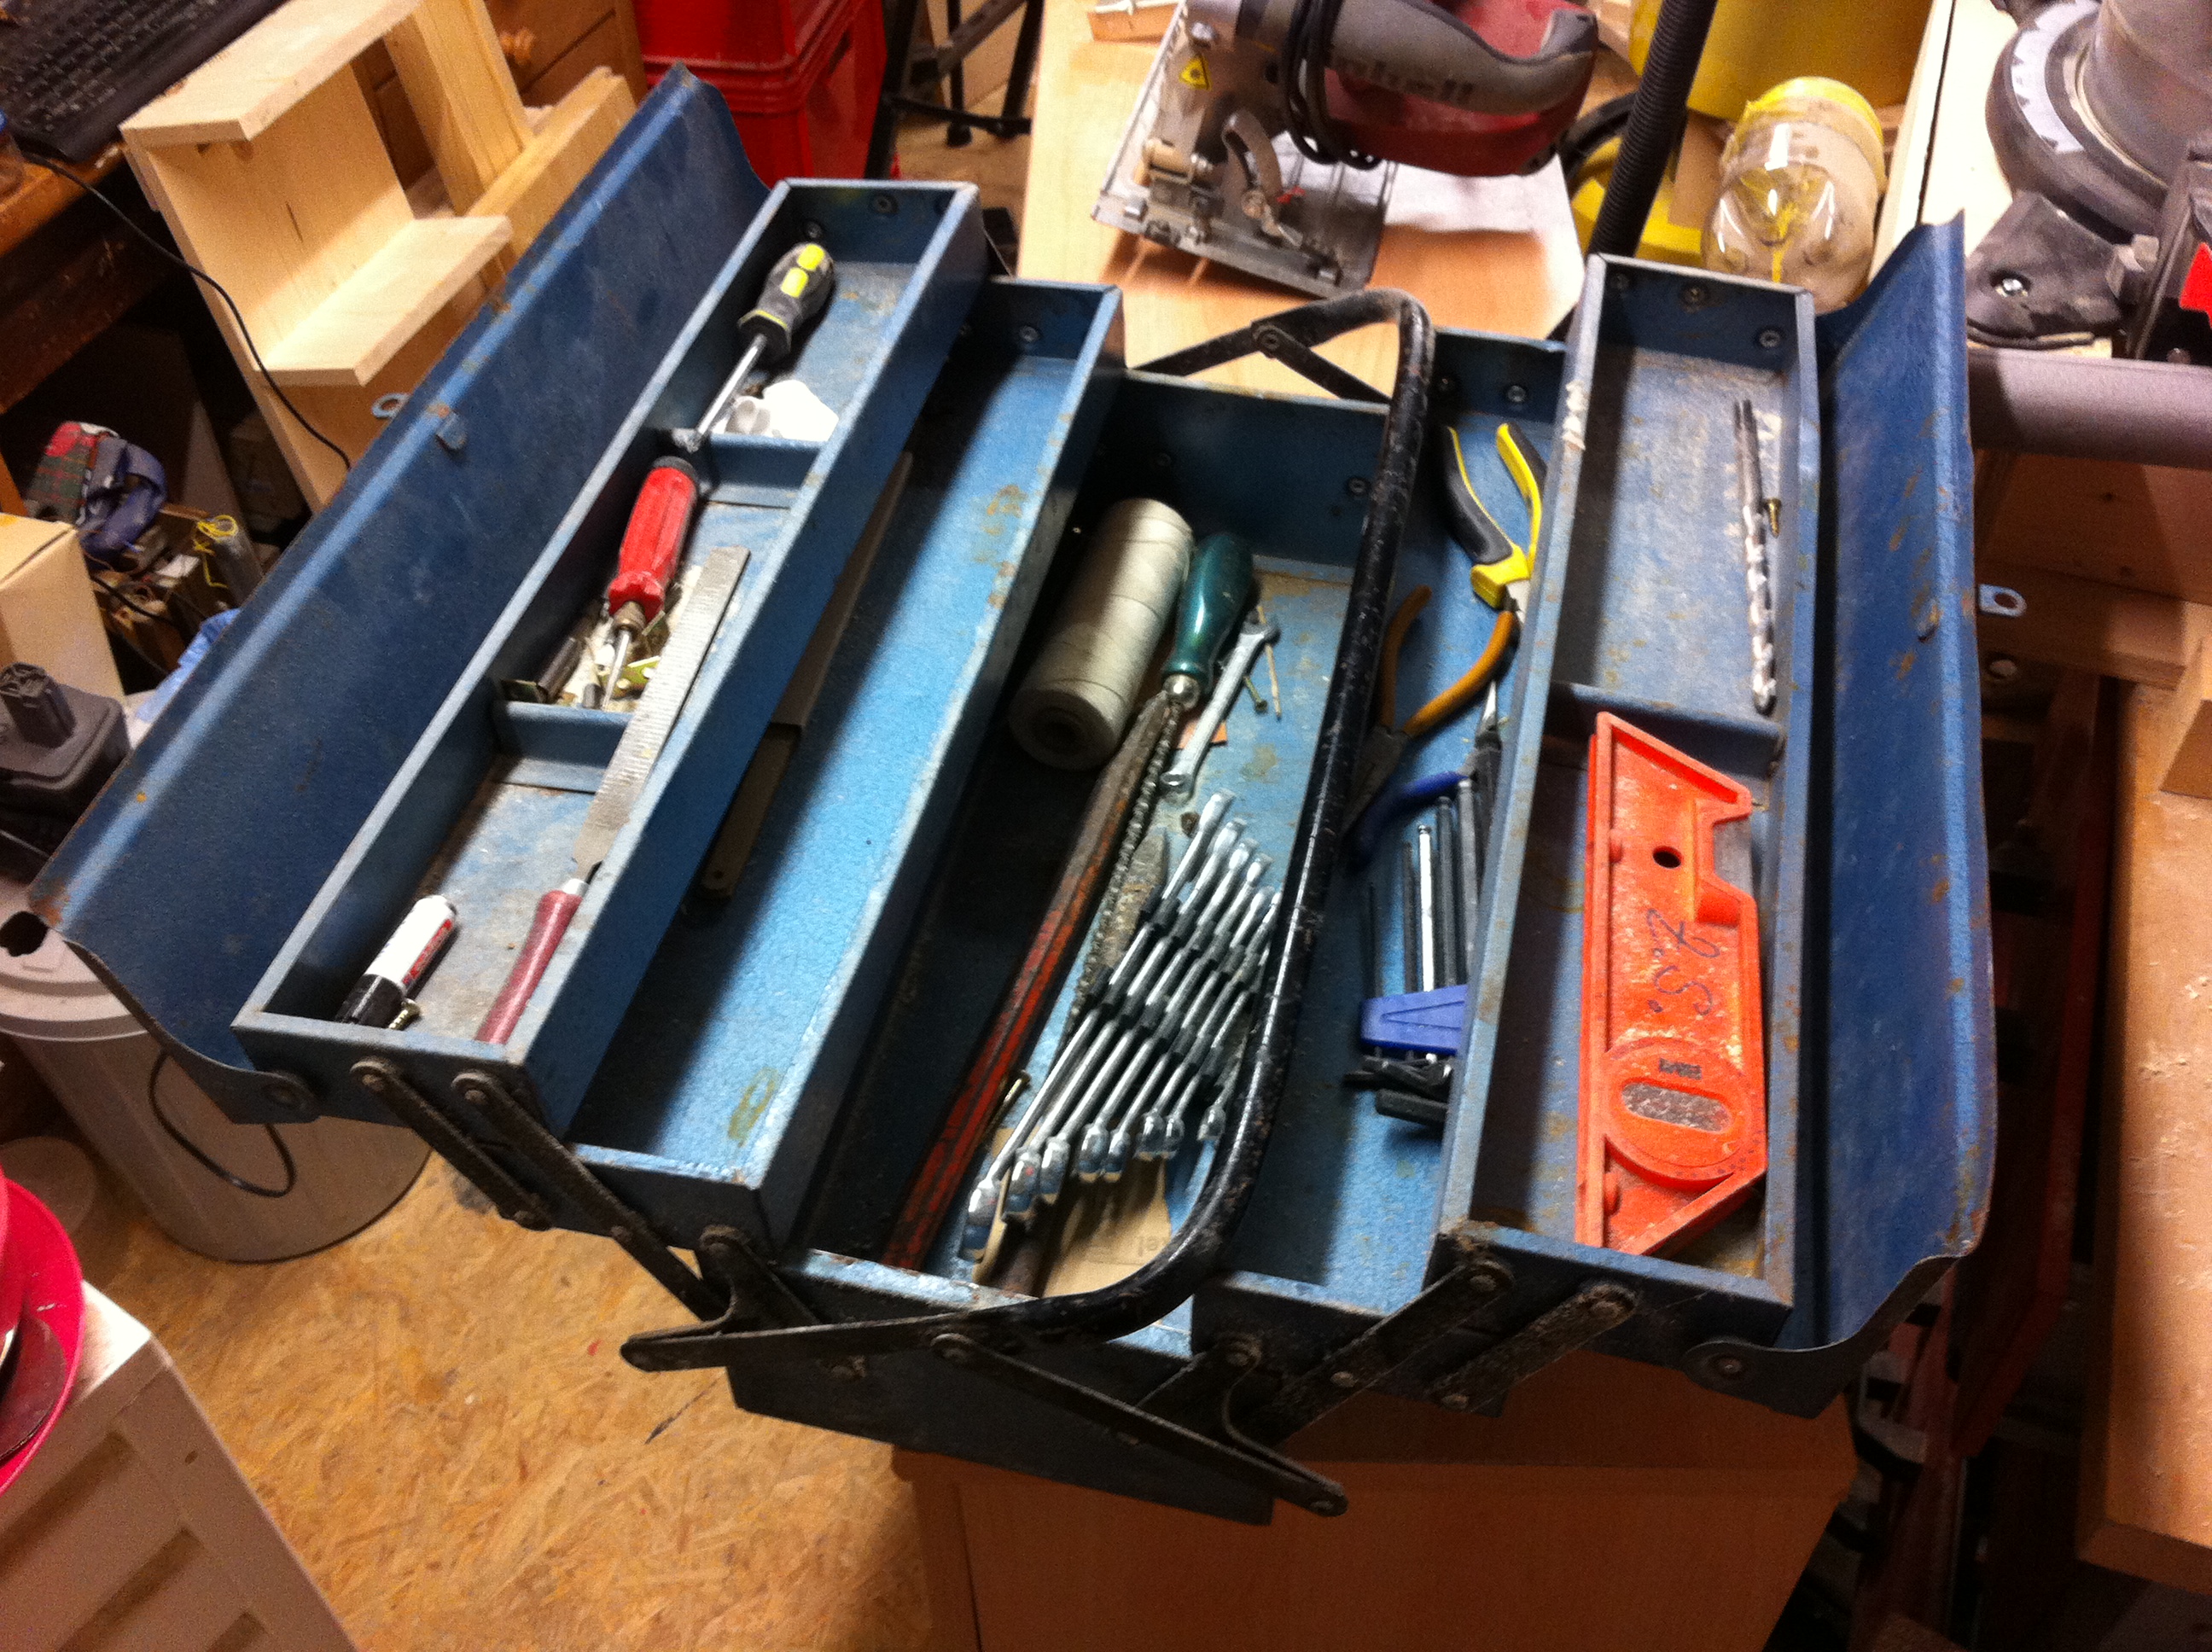

It does have two trays on top of the main compartment that fold to the sides as the handle is pressed down, thus allowing easy access to all its contents when it is being used while ensuring safe transport when it is being lifted up. I have seen a similar design in sewing boxes, usually made from wood, but obviously way more sophisticated than what I put together here, but maybe that is something to try in the future.
Planning the wooden chest
When I started planning this project the first thing I did was creating a sketchup-file that containes a single 2×4. Looking back it contained a slat with the dimension I was going to use, but I did not take into account the planing that still had to be done, so it was not actually accurate. But it was enough to start drafting some ideas, and to get a basic idea of how far the lumber would get me. Suffice to say that I had some leftovers in the end. But it was in there that I started laying out the chest and the mechanism. Since I had nothing to go on I employed guesswork and measuring on the model to get an idea of how it should be done. In order to design the opening mechanism this is the route I took. I will not supply any measurements since they would depend entirely on the size you intend to build and the lumber you are using. But I believe that with these steps you should be able to replicate such a mechanism with ease.
Building the wooden chest
I already had the box “built” in sketchup when I started designing the mechanism, and I had the real piece ready for glue-up when I took the actual measurements for the actual struts. The first thing you need is to know the dimension of the box and whether there will be decorative elements like the protruding fingers in my case. This is important when it comes to placing the pivot points – putting them too close to such obstructions would prevent the struts from completing the required right angle.

Cut the lid according to your wishes – within limits.
The next step is to make the lid. In my case I gut pieces from the sides and glued them together afterwards, but you might also get away with cutting up a chest after you glued it up completely – or anything in between. The important thing is that you need part of the side walls on the lid in order to attach the pivoting struts – with enough clearance if necessary, see above.
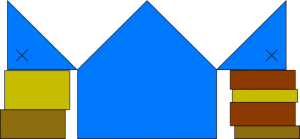
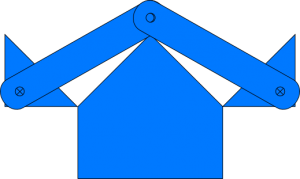
Prop the lids up in the “open” position.
Once that is done you need to prepare for some measuring. Actually, there is only one number that you really need, and to get that, you need to prop your box-to-be up with the lids open. You need to keep in mind that the lids should not open further than 90 degrees from the closed position, otherwise it might happen that the lids get stuck in the open position, which kinda defies the purpose. So get some scrap wood to prop the lid up on. Depending on your plans you might be able to put your hinges on already to make things easier, otherwise you could use painter’s tape to keep the lids in position.
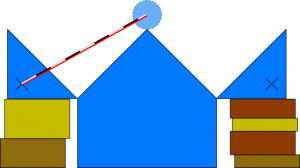
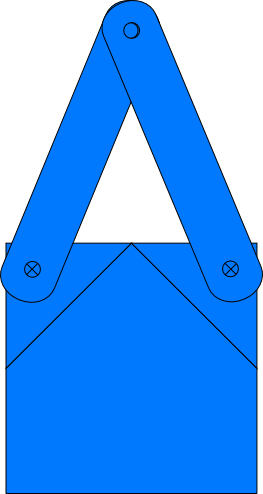
What to measure.
Now use a measuring tape or stick to get the distance from the lid’s pivot point and the place above the center of the box where the handle will rest. Let me explain. I used a dowel for the handle with a diameter of about 3cm. So I aimed for a point 1.5cm above the upper end of the bottom of the chest. I really need to illustrate this…

Translating your measurements to the struts.
With the measurement taken you can go ahead and cut your struts. Obviously you are free to do them however you want, all that is required with this design is to put in two holes (or other centers of rotation) in the distance that you got the previous step.
Assembly of the toolchest.
All that is left is to connect the struts to lids and handle. There are many ways to do it, like using bolts and nuts, wooden dowels, rivets…

Attachment concerns. Top: Without “washer”. Bottom: with “washer”.
But there is one thing you need to keep in mind. The way the struts are attached to the dowel, there are two struts on top of each other, which means that if you do nothing else they will be at a slight angle, meaning that they need some freedom of movement in the pivot points. So either you can use a method that gived the struts this leeway, or you can add a kind of wooden washer the same thickness as the struts to those struts that are facing outward on the handle. For my toolchest, I used the angled method with through-holes for the bolts that gave the struts room to move.
Closing up.
That should do it. Once everything is in place, lift up the chest by the handle and the lids should close as advertised. Of course it is possible to devise more mischievous mechanism for added compartments like the metal bos shown above, but they all require a lot more planning and accuracy than this design. In order to take advantage of the open position of the lid, you could add holders to the inside of the lids that become easily accessible once the chest is opened.
The tools
There is no plan for these, as they have all been improvised, but I wanted to mention that this is in my opinion the best approach to this. The idea is for the tools to look slightly cartoonish, hence the vibrant colors. As such, it does not matter whether the handles are actually round, and mine were not since the stock I used for them was larger in width than twice the roundover bit used. Virtually no connection was a good fit, especially with the pieces shaped on the sander, hence the use of epoxy instead of wood glue. Well, except for the plane, this is actually a friction fit, created with a mallet. I hope you found this post helpful. If you have any questions or feedback – or if I missed something – please comment and let me know!
Inspire your inbox!
Subscribe and never miss a project!
Thank you for subscribing!
Something went wrong...