First, the MESS, or Miniature Elevation Sub-System, is a system to emulate flight or floating on the battlemap for tabletop toleplaying games. You can find more about it over on Walking Papercut, and the files to print your own on Thingiverse for free. In this article, I want to dive deeper into how to dismantle meteor lights, a type of christmas decoration, and why that is a good idea.
What are Meteor Lights?
Meteor lights, or fairy lights, or rainfall lights, are a series of tubes holding individual strips of LEDs that light in sequence from top to bottom with an element of randomness to them. This creates a drop-like effect, thus the name(s).
They come in different colors, but the functionality is generally the same. You can find examples here or here (affiliate links). I picked up blue ones, which surprised me with their brightness. But that may just be me showing my age.
What to expect
Through a maker lens, there are a number of things you can salvage and reuse from a set of meteor lights.
- The Tubes – this is the part I used in another project so it comes first. Each length of tube (depending on the product about 30 cm or 12″ long) is clear and flexible and, in my experience, not prone to breaking easily.
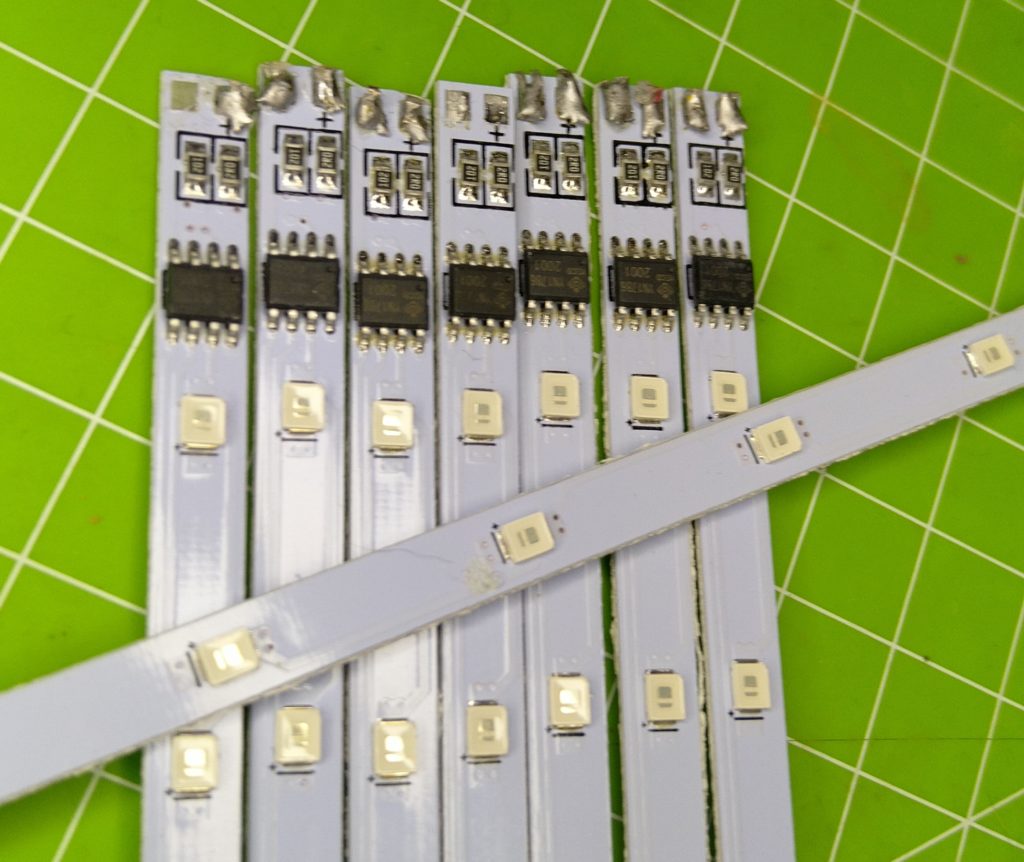
- The LEDs – this is in my opinion the most promising componend. You get a somewhat flexible strip (basically a pcb) with LEDs at regular intervals (about every inch) and on both sides. Each pair of LED is linked. Once powered up they will light up in sequence, starting from the end where the cable comes in. Then, it will take a short break before doing it again.
The thing that makes this even more interesting is that each strip has an element of randomness to it. If you connect two, they will light up simultaneously the first time. But the length of the break will vary so that over time you get a cool random effect.
And did I mention that they run on 5V, aka USB? - The Cable – a lot of sturdy cable from something meant to hang in a tree while also plugged in. The cable itself is sturdy with little left to be desired, and the USB plug is a desired bonus.
The only thing I had to throw away for lack of expected use case were the end caps and some snippets of wire that I cut off.
How to dismantle Meteor Lights
The tubes come with sealed caps on both ends. These make the whole assembly ready to face the weather outside. So if you want to use them outsde it might be an option to keep them in their “shell”.
First, I tried to remove those end caps off using screwdrivers and prying action. I also added heat from a hot air gun to soften any adhesive used, but that only softened the tube to the point of modern art. Instead, I recommend cutting them off completely.
The easiest way I found to do that is to use good scissors. Place the tube in the V between the cutting sides and rotate it while excerting gentle pressure with the scissors. Eventually, it should come off easily. Do that on the end with the cables first. Then you can simply snip off the other end (or any length you want) using those same scissors and some brute force.

This leaves you with the tubes (so go ahead and make a MESS!) and the LED-strips still connected to the wiring. If you can work with that, great, head straight to your project. If not, cut off the cables or unsolder them where they connect to the PCS.
That’s it. Nothing left to take apart, everything waiting to be put to good use.
Meteor Light usage beyond the MESS
Here are a couple of ideas to make use of what came out of those meteor lights. I feel I should mention, though, that they do make a nifty illuminative decoration piece even before you take them apart!
The LEDs do a great job at simulating the flow of something. Put them in places where you want energy (or magic) to travel along a path. I can see those strips provide power to parts of a mechanised armor costume. Or used in some kind of arcane reactor where the energy circulates.


Or you could arrange them in a way that one end or the other touches, leaving you with a three-dimensional spiky ball. The lights will then either travel inwards or outwards, creating either a “tame black hole” or a “gentle explosion).
Random Randomness Remover
But, I hear you say, what about the randomness? There is a way to defeat this feature if you really need to. The first “drop” is always right when you put current to it. Connect them to a microcontroller that powers them for one sequence, then cuts the power and turns it on again. You should now be able to harness the randomness and even make a couple of strips flow in sync.
Don’t forget to make a MESS!
If you are into tabletop roleplaying, head over to Walking Papercut where I wrote about a system I designed to emulate floating on the battlemap!


If you enjoyed this you should really check out my other projects. And if you think I’m weird (no idea why you would think that) I provide you with evidence right here. Thanks for stopping by, and Be Inspired!
Inspire your inbox!
Subscribe and never miss a project!
Thank you for subscribing!
Something went wrong...
We respect your privacy and take protecting it seriously!
