
The Hotline is an “ancient” rotary phone without the rotary part, that enables you to talk to another plane, in the game Control. This is not the only item from the game I want to make a dust catcher out of – I already made a Service Weapon, and am working on an HRA. I just hope that this will bring you tips and inspiration for your project, no matter what they are. So here is how I went about making my Hotline.
3D printing
I am sorry to say, but there are few ways to get/make the Hotline without resorting to 3D printing. This phone is a rather organic shape, and while you could carve it from foam (extruded polystyrene) or maybe even wood, I don’t think these are decent options considering that it needs to be symmetric. The finishing process would also be a lot more demanding this way.
Shortcut: Throw Money at it
You might be able buy the phone that the Hotline is based upon – an Ericsson Dialog. But you have to be lucky and willing to pay good money for one. I cannot tell whether they were rare to begin with, or whether the game made them so. They also need to be modded to resemble the Hotline, but I will not get into that because I won’t buy one. And I doubt new ones will be made any time soon.
Getting the Files
I am more than willing to pay a few bucks for a good model. While I’ll gladly take free stuff, I know the work you need to put into good files, and the hassle they can save you when printing. That being said, the file I used by Sketchfab-user Keeya is free to download. It might not be the most accurate rendition, and requires a tiny bit of Blender use, but it works, and that is enough for me.
There are other files available for double digit price tags that are meant to be used in animation and such, which also feature the rotary dial part. Thus another reason to go for the free one.
Blending the File
I have mentioned Blender before. It is a free, open source, and very capable 3d software. And I am not a Blender expert. In this case, I merely opened the model in Blender – it comes in the native .blend format – to export what I needed for 3d printing.
When you first open the model, you will find the hotline on a table with three legs. Based on that, and the fact that the file came with textures, this file was meant to be rendered. We will do just that, only in real life. Isn’t making exciting?
Select the first part you want – either the phone’s main body and the receiver. Then go to File -> Export -> .stl and make sure that “Selection only” is selected. Then find a desirable folder and give it a pleasant name. Hit export. Repeat the same for the other of the two parts, and you can close Blender with another job well done.
Creative Printing
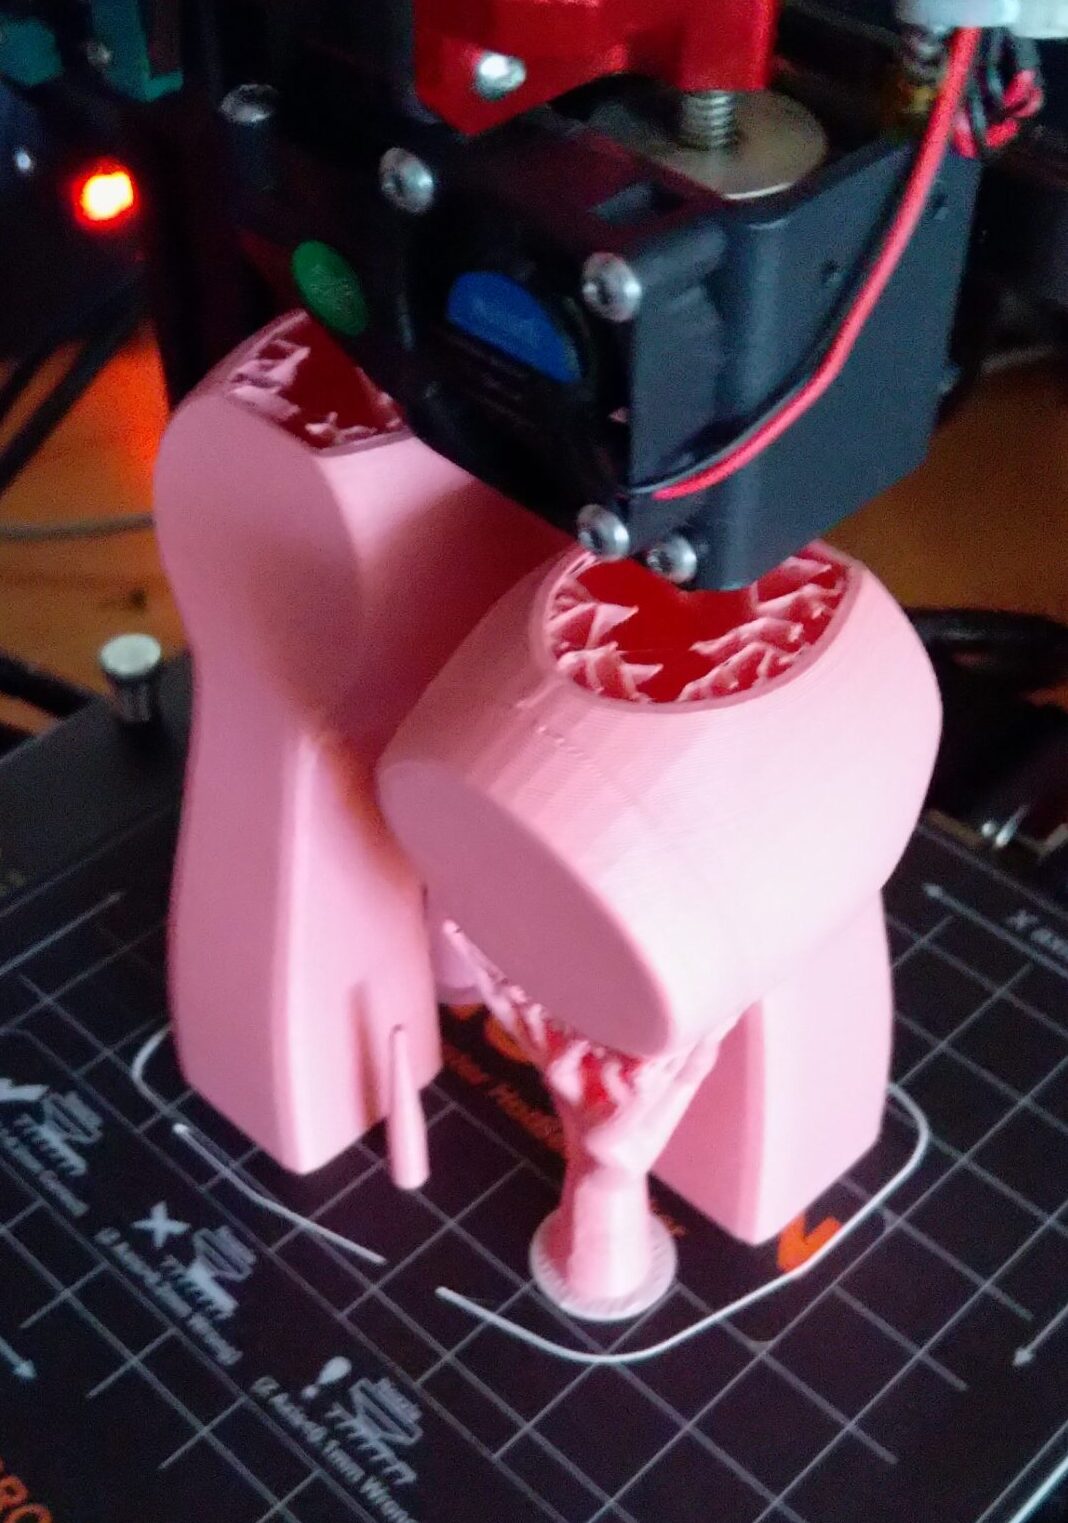
Now you need to print those two files. I have been 3d printing for years and made my share of mistakes. And since no two printers are completely alike, I hope you have taken the time to amass experience with your setup and software, because I cannot get into every detail here.
First, check the parts in your slicer to make sure the exporting process went well. I had to scale mine up by 2540% to get something usable, and you might be able to avoid that by knowing more about scaling and units in Blender than I do. But as long as you scale both the same and the final size is close to phone-like, you are fine.
To make printing easier I split the receiver in two. While I want to add some extra touches to the whole thing later, this part does not require any alteration beyond that.
Side note: if you do not have a printer that features a large enough print bed to accommodate the Hotline, you can easily cut it in four pieces. PrusaSlicer’s newest alpha release features some nice tools for that, but every slicer should be able to do it. Let me know if you want more information about this part.
Booleans
I want(ed) my Hotline to ring. I admit, this is the kind of mod that I will never use once it works, but that is not a way of thinking that I personally enjoy. So, I need(ed) two things: access to the main body insides, and a way to switch it on. Spoiler alert, I have decided to forego that idea for now, but I still wanted to be able to add it later.
I am using Prusaslicer. What I am describing here might or might not work in other slicers. With that out of the way, the main feature I make use of for the phone body is lightning infill. That means that there will only be infill where it is necessary to support everything above. That leaves most of the phone volume empty for whatever I want to add later. It is not meant to stand up to heavy loads, anyway.
Another feature are negative volumes. You add a block that you can scale and move, and it will subtract that print from the main shape. Using two of these. I added a square indentation to the bottom, and another, slightly smaller one. The idea is to pop the “lid” to access the insides, then print a replacement using the lip all around it.


Finally, I want(ed) to add a switch to the black thing in the center of where the rotary thing would be on a normal phone. To separate it I am again using the split feature. The newest alpha version of PrusaSlicer allows you to tilt the plane that separates the pieces, allowing me to cut off most of that knob without interfering with the rest of the print.
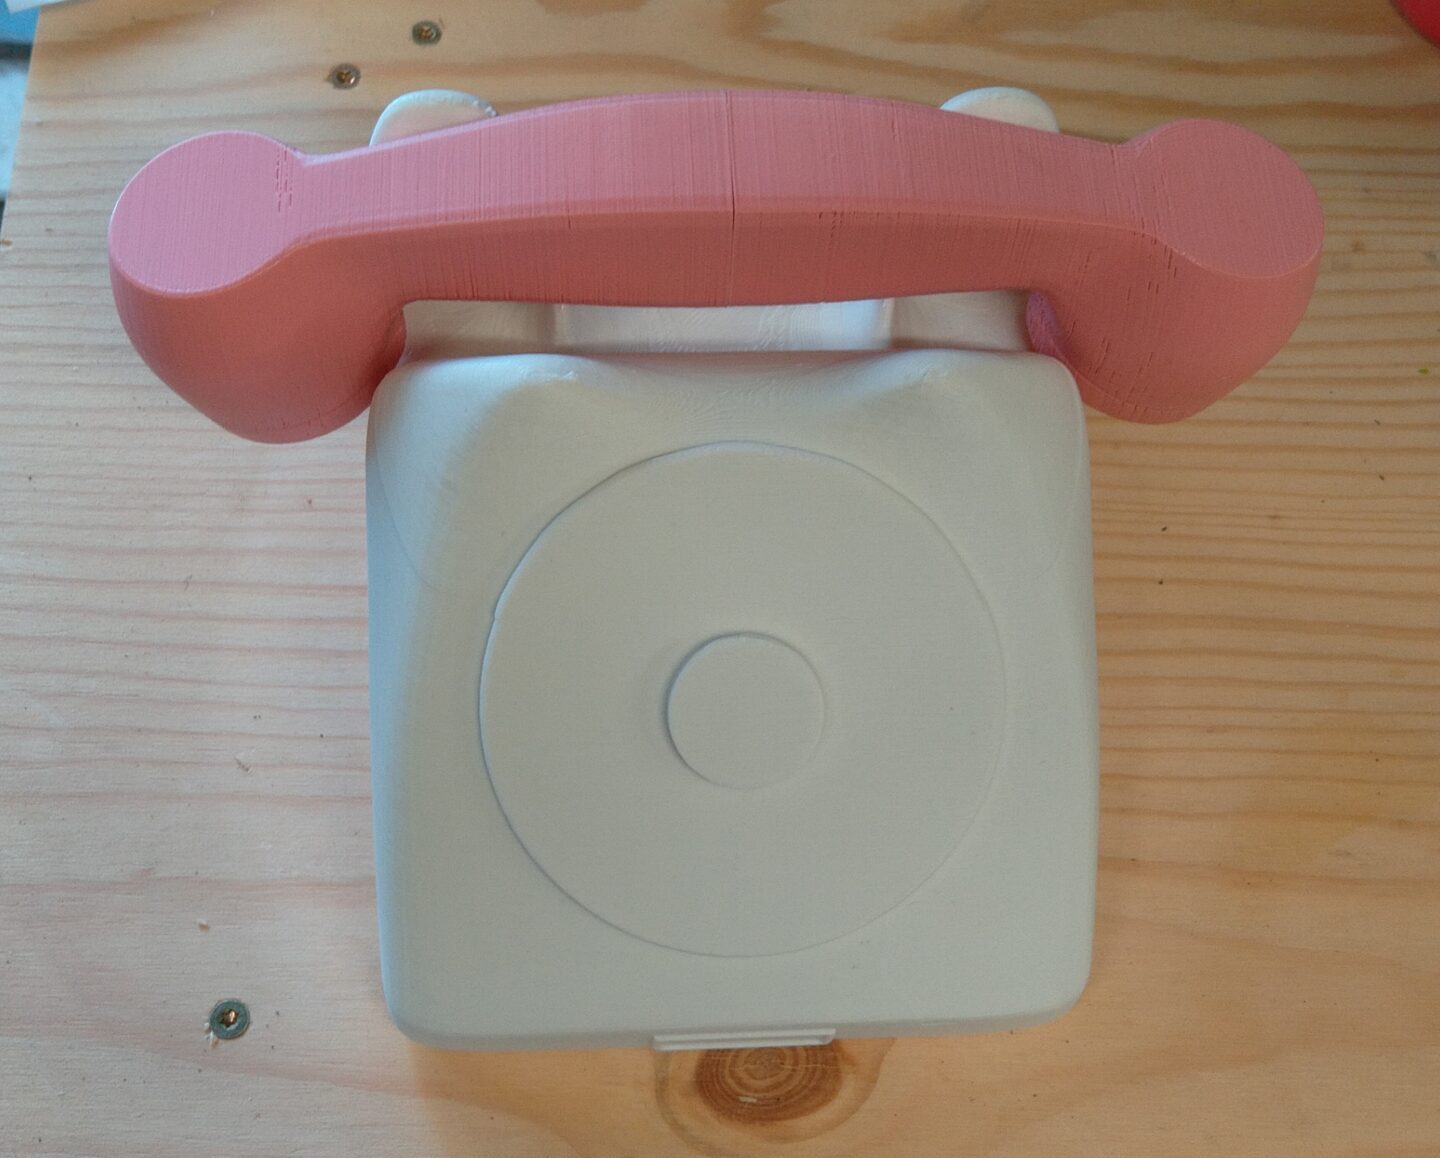
Painting
This step is pretty simple and is shaping up to be my go-to for 3d printed things. I first add a number of layers of tinting paint. If there are surfaces that can easily be sanded I will give them a light sanding between coats. Same goes for smaller imperfections. Eventually, I will use spray lacquer to seal everything in, but before that, there is more work that needs to be done on the two pieces.
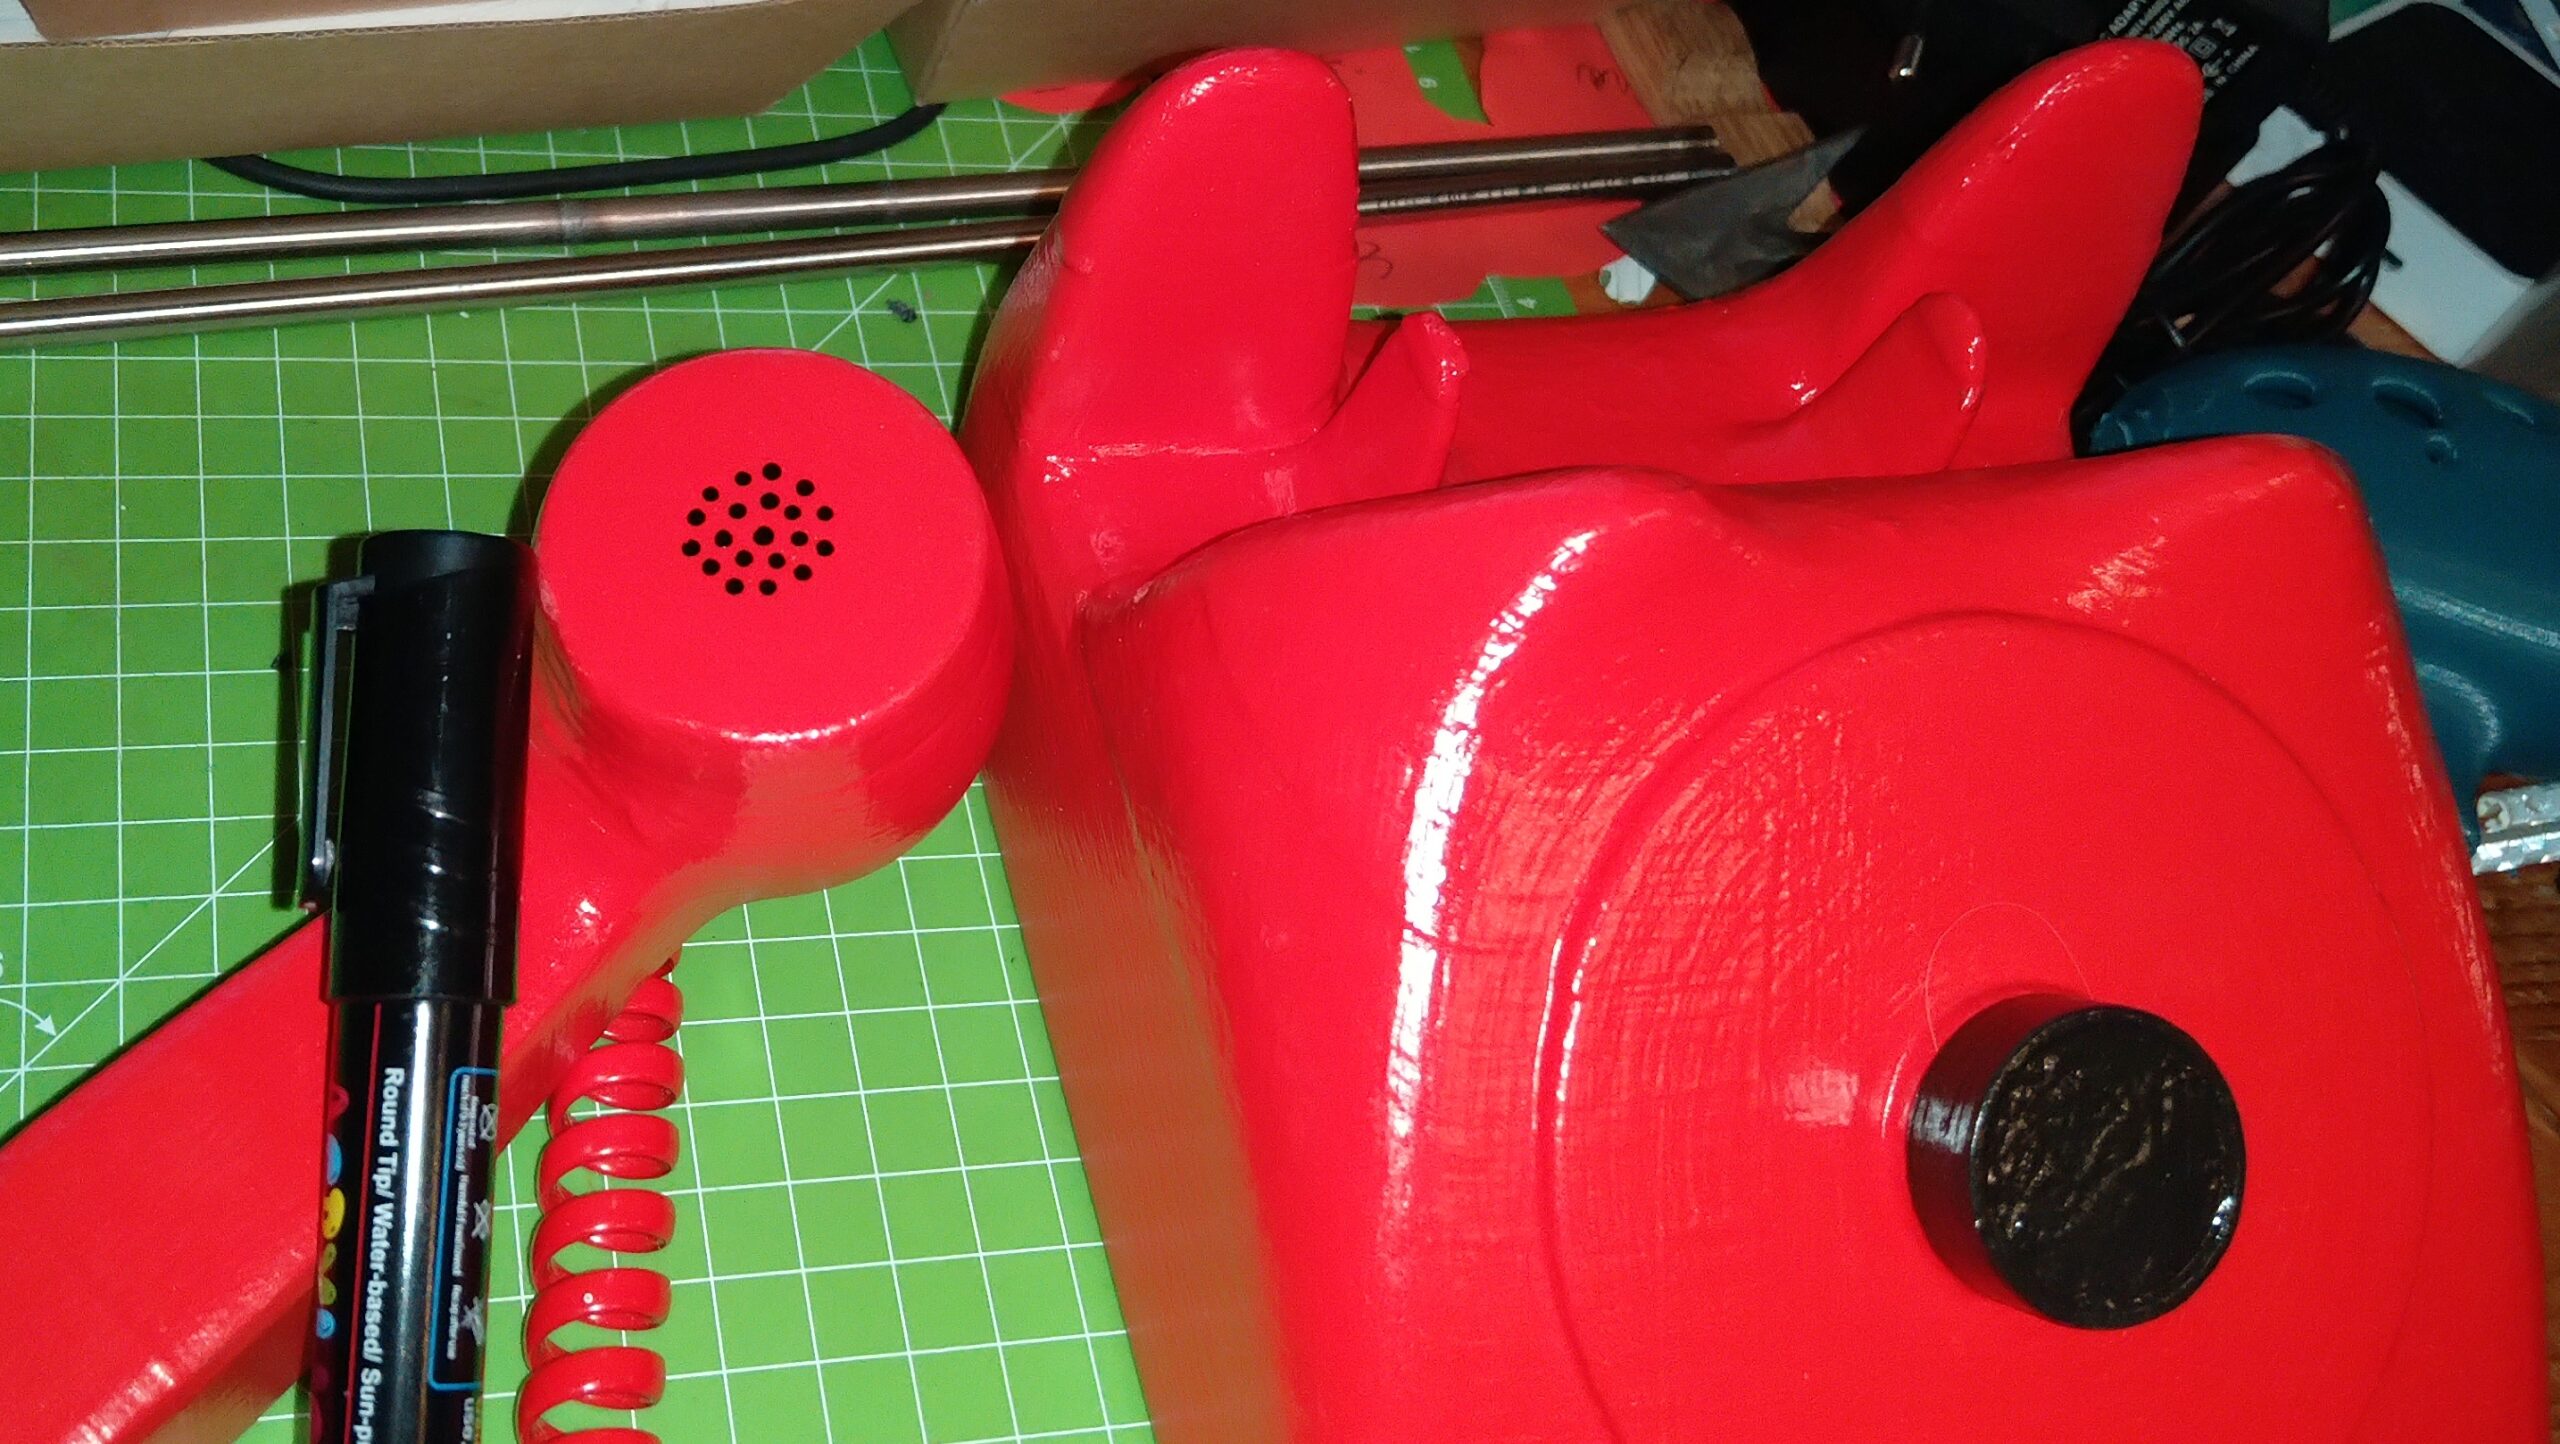
Beyond the very red base color, there are two things to add in black. One is the “dial” button in the center, and the other are the speaker and microphone holes in the receiver. While I considered drilling those, I do not think I could make them look right – not without some black material underneath, where everything is pink or red. So I painted them on instead, using an acrylic marker*.
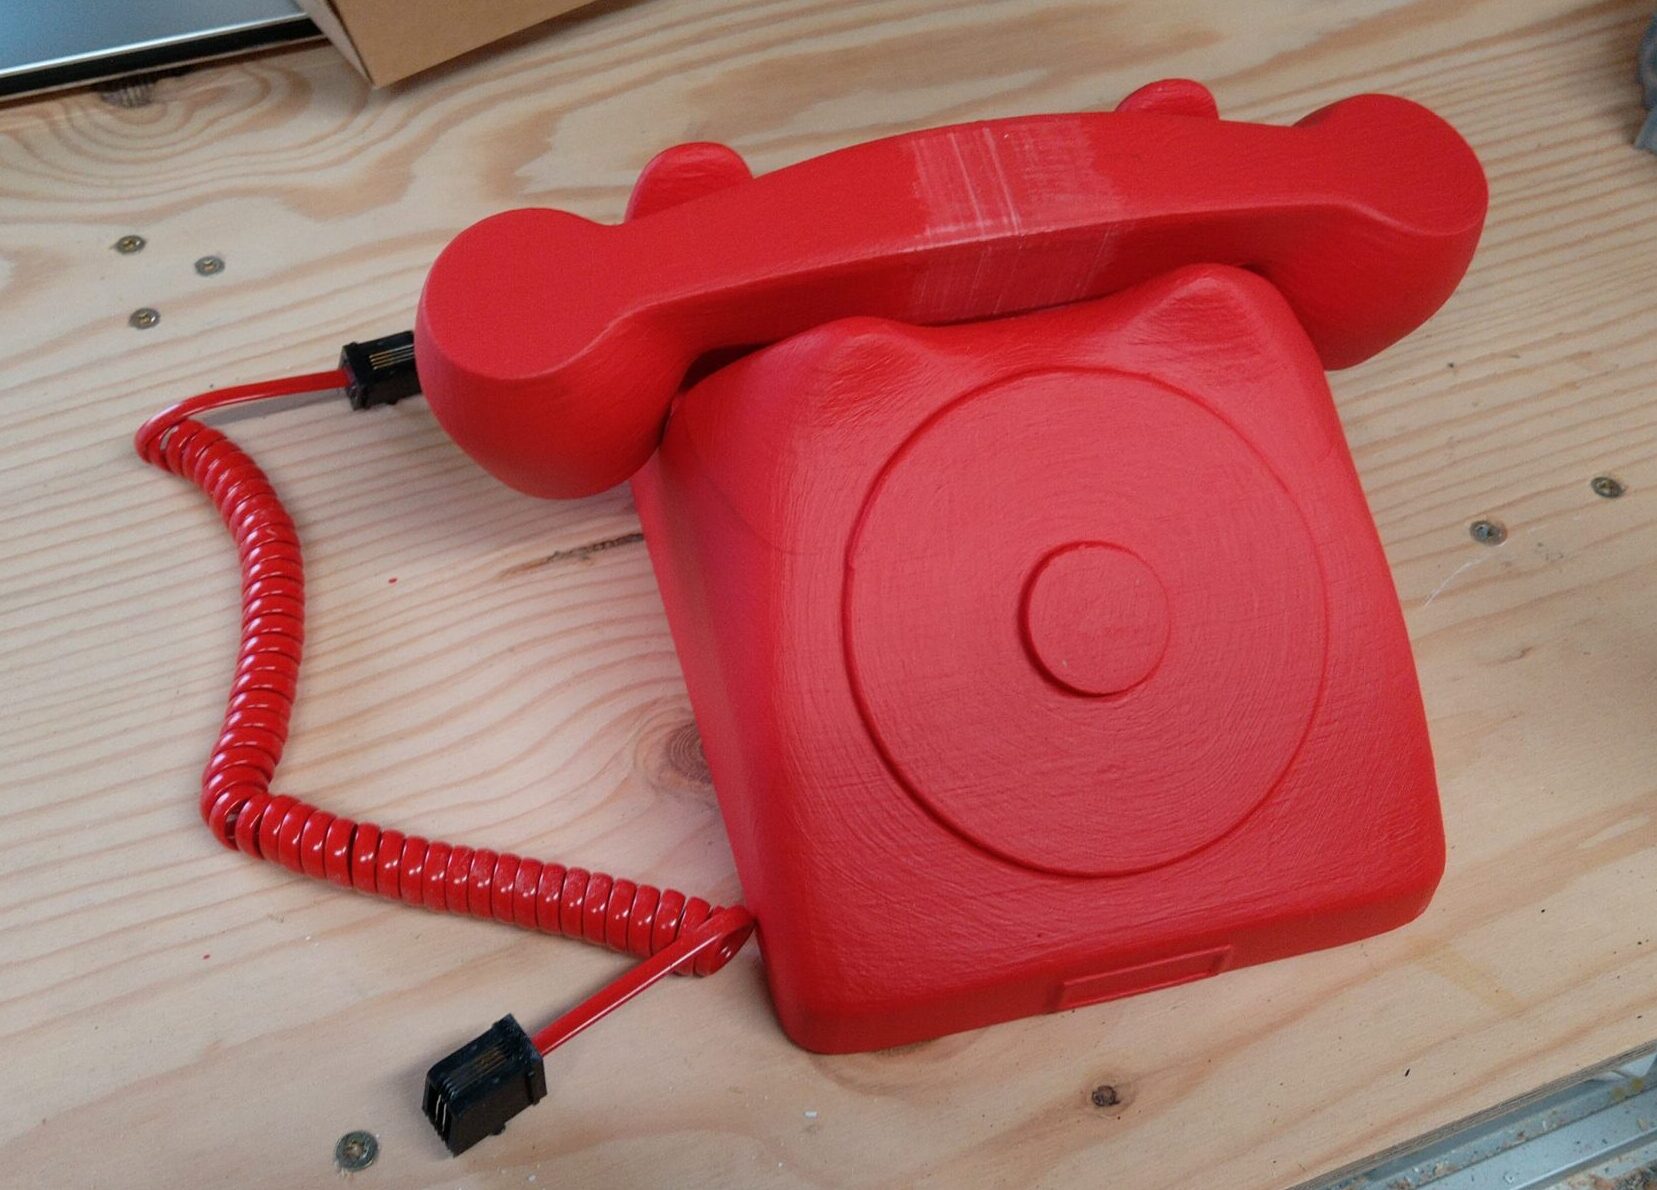
The Cable
While I like to keep things, I do not think I ever came across a red receiver cord in real life – until I ordered one online. Thankfully, a friend of mine found two connectors to match in their collection. The plug is called RJ9, although according to my limited research that is not saying much. You can of course order those online as well, but it never hurts to save a bit of time and money.
Inset the Connectors
First of all, I do recognize that the original item does not have connectors like these. The cable just comes out of it, no plugging necessary or allowed. But I am taking this liberty with the design, because it is easier to pull off under the circumstances. Also, I seem to recall that Objects of Power like the Hotline have the ability to visually change over time.

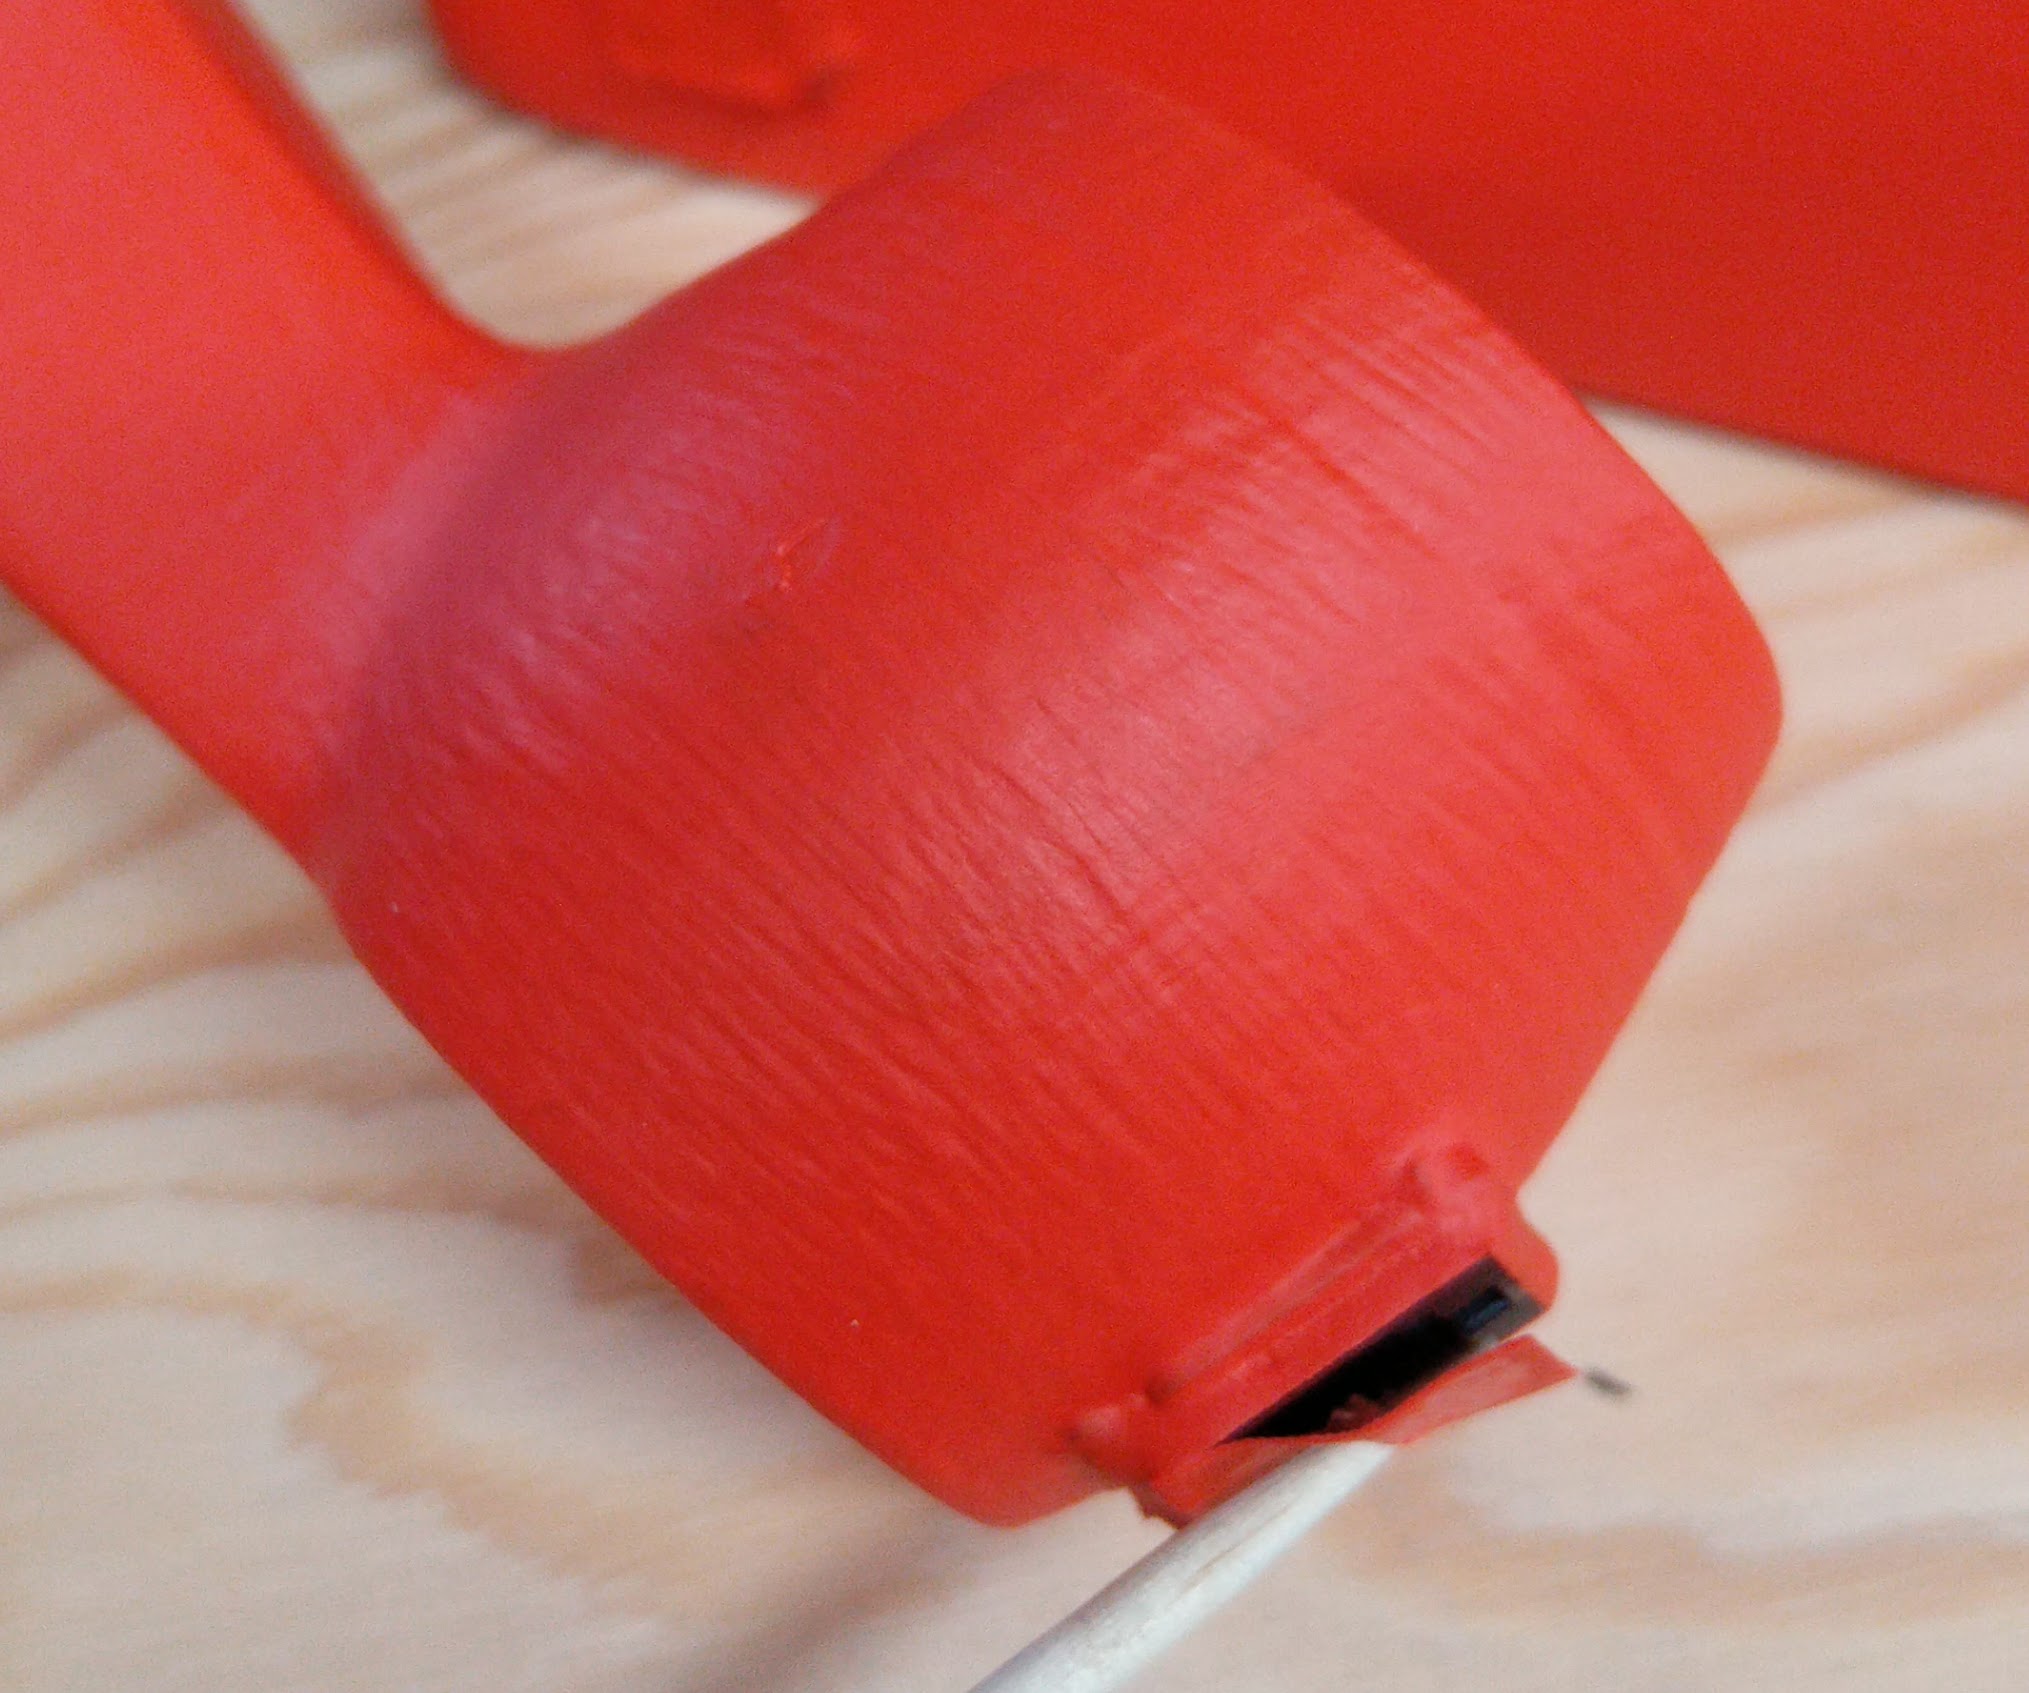
I am using a rotary tool* with a burr thing to create the holes. If you look closely, you can see the pencil rectangle around the hole I already made in the body. Make sure not to go too fast, because PLA is obviously thermoplastic and can easily melt and wrap itself around your tool if you are not careful. I wasn’t on more than one occasion.
Once the hole fits – I had to remove some nubs on the socket pieces as well – you can think about gluing them in place. I opted for hot glue, and for that I extended the slot just a few millimeters in the “vertical” direction. I placed the socket all the way in one direction, pushed hot glue into the gap, then pushed the socked in the other direction and filled the other end with glue.
To improve the design, I then shaped the hot glue carefully to not look like hot glue. After covering the socket part with a piece of painter’s tape I then painted the black part red. I only removed the tape after finishing the whole thing with glossy spray lacquer.
Making it Ring
Thinking about the item from the game, I had the strong urge to make my Hotline ring. There is a distinct ring tone, and I found it online. All it would take is an Arduino, a board that can play MP3s, a button to trigger it, and a power source. Which, frankly, is a lot for a single noise.
This is entirely optional and probably way too much work for something that you will never use beyond a couple of times while it is new. So while I put way too much thought and a moderate amount of effort into it, I think I might forego this feature to save time. But the option is there.
Beyond Ringing
The mp3-playing board I have on hand is rather overkill for a single ring tone. It can play up to 254 different files depending on how you set it up. Which got me thinking that it would be cool – although probably not sensible – to add all the Hotline’s in-game monologues to it. You could use the rotary knob to select them, although it would be hard to add any logic beyond going through a list in sequence. Not to mention the issue of extracting them from the game firts.
To make it more realistic – and give the cord something to do – you could add a speaker to the appropriate end of the receiver. That would require extensive modifications of that part, though, to make room for the speaker and the cables, but it could take advantage of the cord to send signals. I will file that idea for “Hotline 2.0“.
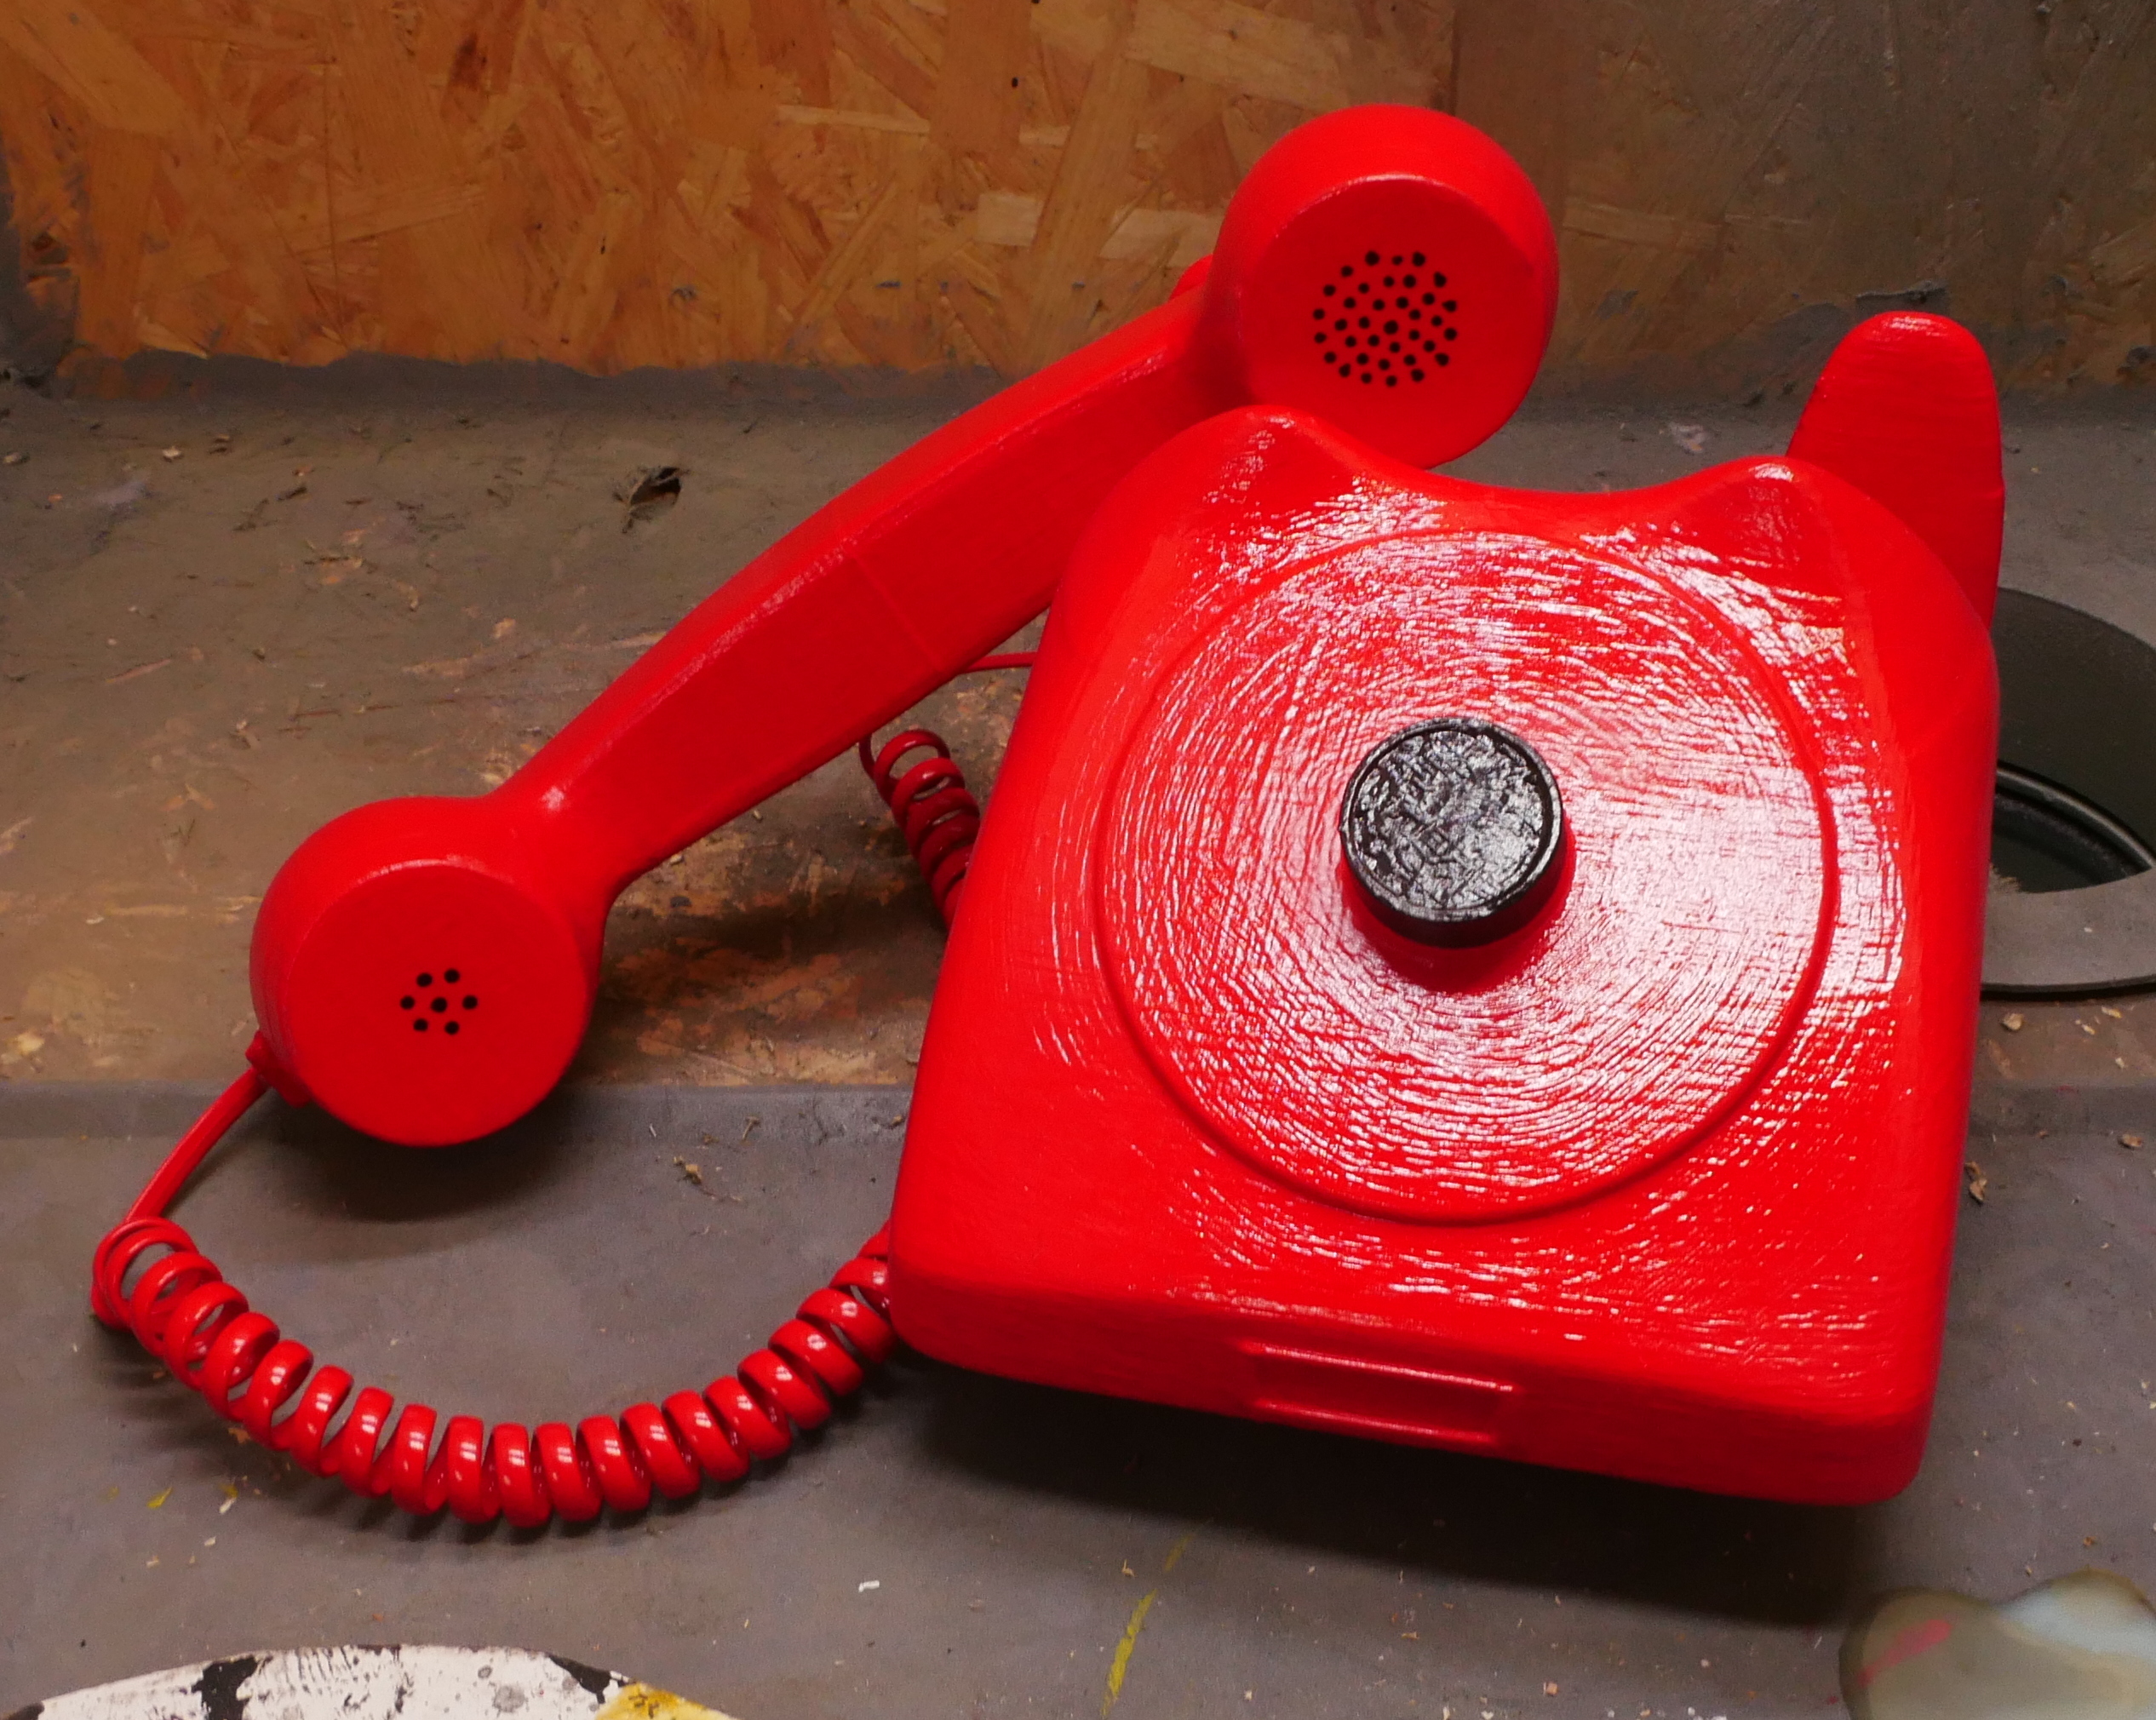
Hotline Finished
First of all, I am happy with how it came out. I am aware that I could have done a better job, but probably not in the same time-frame, and I value my happiness with a project more than its fidelity. Still, using the same methods and adding more time and sanding, you could make your own hotline (or project) a lot smoother.
I would love to hear what you think – about the game, the item, and my technique – so join me on Discord! You can also check out other posts on this site if you so chose. And as always, remember to Be Inspired!
Links marked with * are affiliate links. At no extra cost to you, they kick back a few cents to the channel.
Inspire your inbox!
Subscribe and never miss a project!
Thank you for subscribing!
Something went wrong...